How to change PHP version in XAMPP for Windows

I am a PHP developer building solutions that solve problems and makes the web easier and better for everyone
Have you ever wondered how to upgrade or downgrade your PHP version in XAMPP without having to install another XAMPP software?, Well i have and from most answers i came across online, the best option i saw was to download an updated version of XAMPP, but looking at it, i knew there had to be a better way so i made some research and was able to figure it out. I would show you how to do this in steps as i would be changing my PHP version from 7.4.15 to 8.0.19, the steps are the same no matter the PHP version you want to upgrade or downgrade to.
Lets begin, this is a screenshot of my current PHP version
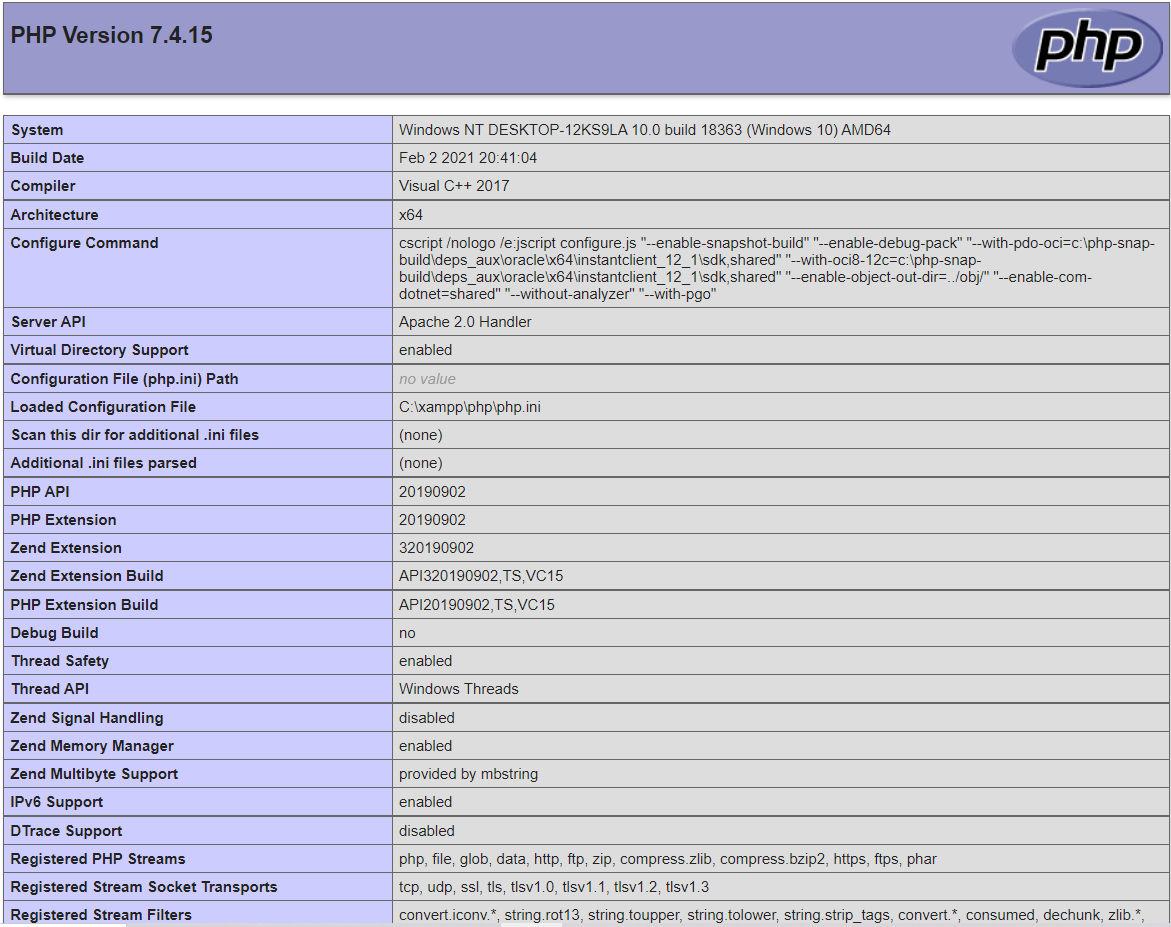 If you don't know how to check for your PHP version, you can go to this link when your Apache server is running.
STEP 1
Download the PHP version you want to use (i.e 8.0.19 for this example), you can find your preferred PHP version to download from PHP's download website for windows, but there is something you need to know before downloading any package, the download for a PHP version exists in 2 types which are thread safe and non thread safe. Since you are using PHP with XAMPP, you are going to download the non-thread safe version because there is an apache file it has that would be used to configure XAMPP with PHP.
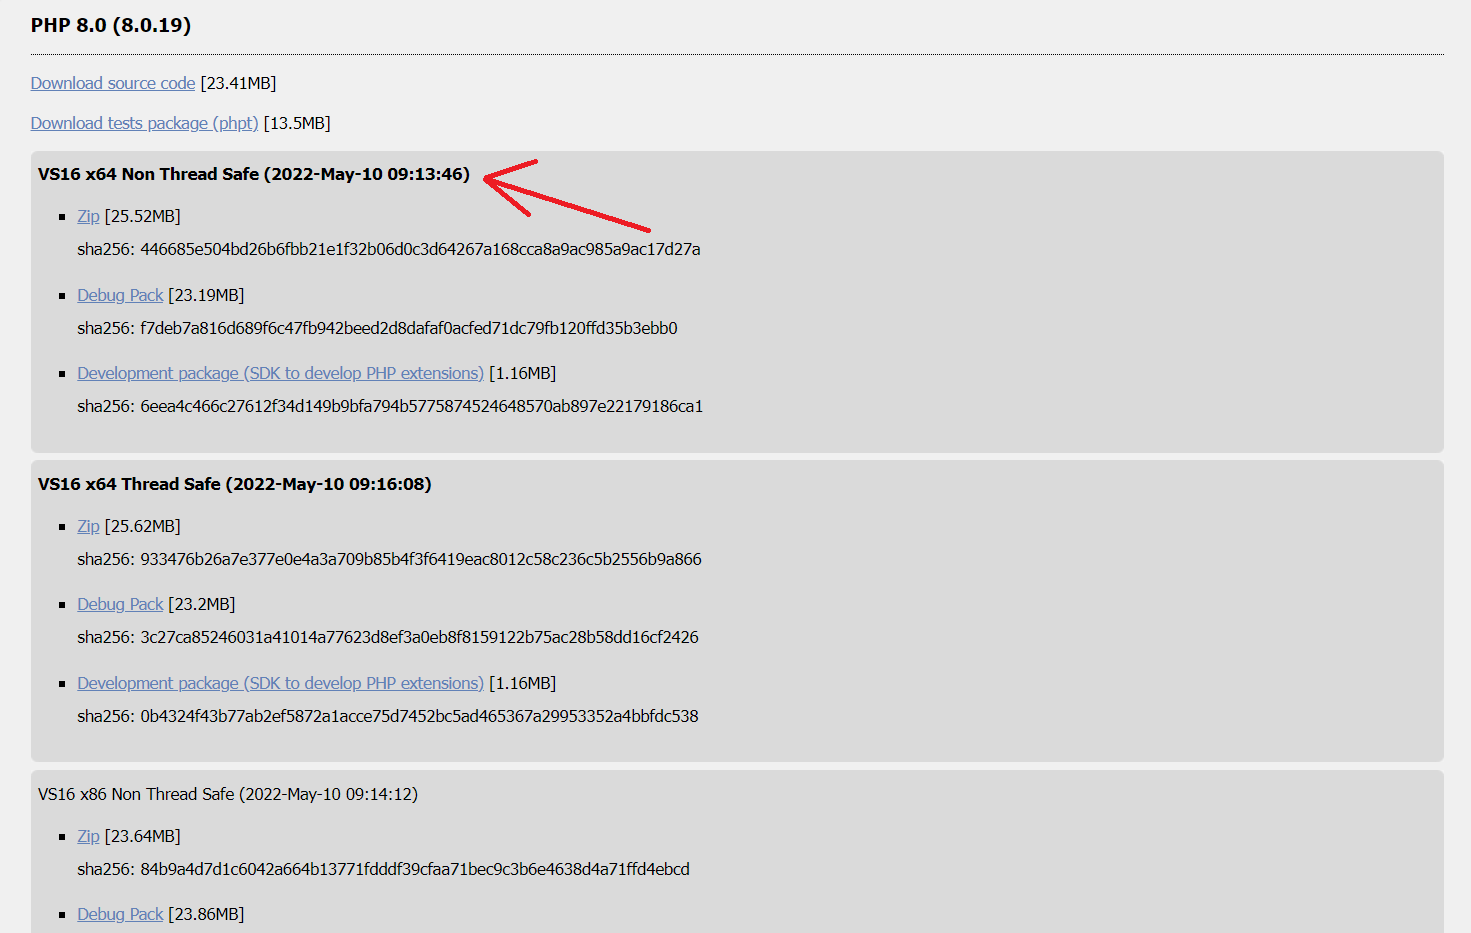
After locating it, download the zip file. If you are running on a 32-bit system, then download the non-thread safe version labelled with x86.
STEP 2
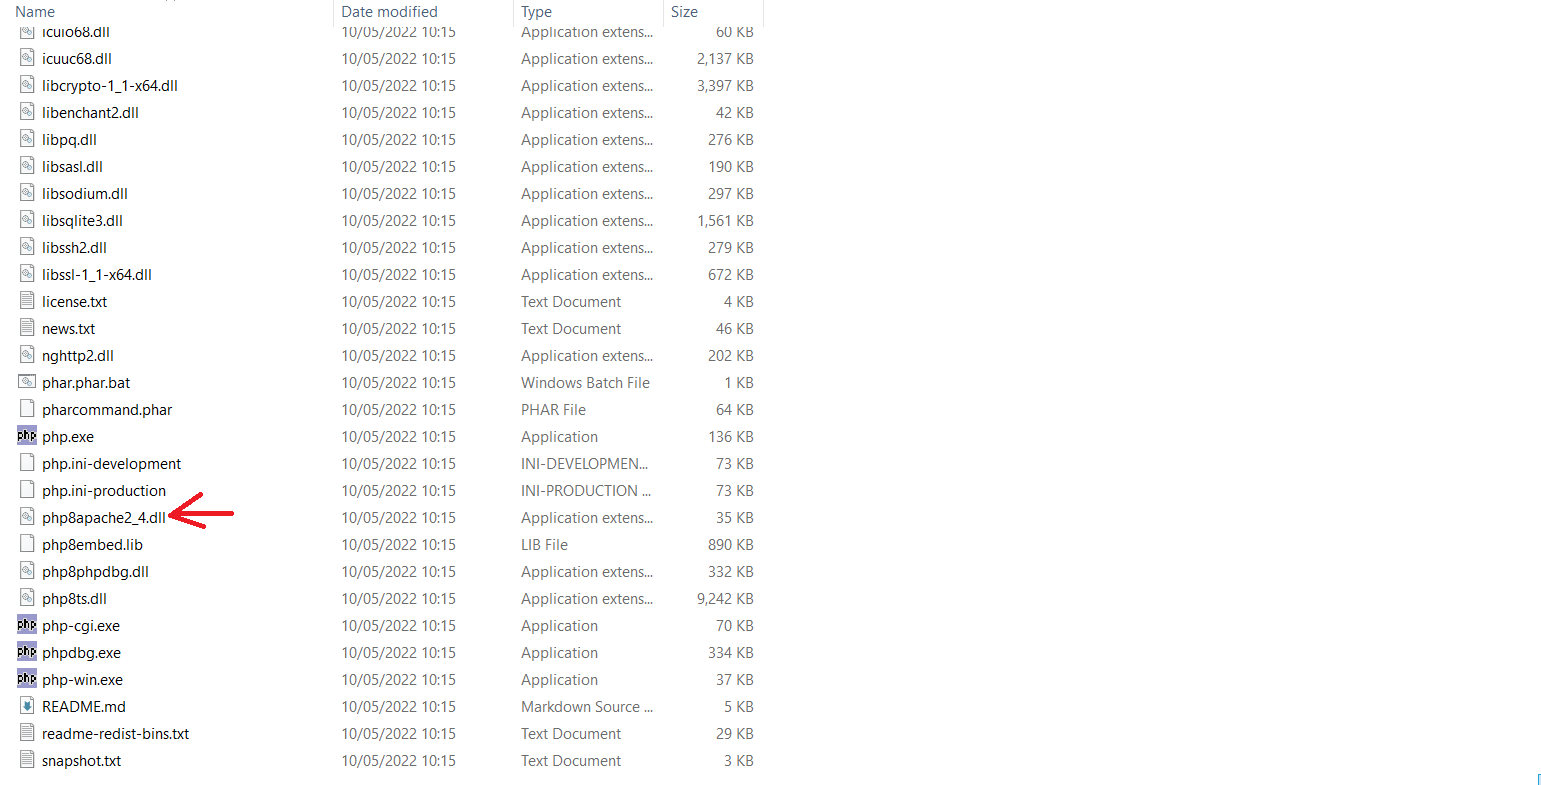
After you have downloaded it, extract the zip file and rename the extracted folder to "php". Open the folder to find the apache file i mentioned in step 1 as shown in the image below, once you have seen it, you can move the php folder to your xampp folder but make sure the previous php folder there is either removed or renamed to something else so that it won't conflict with the one you are moving.
STEP 3
After moving the new php folder into the XAMPP directory, open the folder and look for the php.ini file, if you can't find it, then the name of the file is either stored as "php.ini-development" or "php.ini-production", these two configuration files are used depending on the environment you are working on, since you are using XAMPP, you would be working in development so you would use the development config file, so rename it to "php.ini". If you are in production, you would use the production config file instead.
STEP 4
Next open your XAMPP control panel. Under the actions panel for Apache, look for the config button, click on it and select the "Apache (httpd-xampp.conf)" file to open it up, this is configuration settings that helps XAMPP to run PHP. Look for the following:
LoadFile "C:/xampp/php/php7ts.dll"
LoadFile "C:/xampp/php/libpq.dll"
LoadModule php7_module "C:/xampp/php/php7apache2_4.dll"
LoadFile "C:/xampp/php/libsqlite3.dll"
- Change php7ts.dll to php8ts.dll
- Change php7_module to php_module
- Change php7apache2_4.dll to php8apache2_4.dll
NOTE - Search everywhere in the file for php7_module and change it to php_module as you would need to change it in some other places within the file.
STEP 5
After you have done all this, save the changes and either start or restart your server, go back to this url and confirm that your PHP version has changed. if everything was done correctly, you should see that you have successfully changed your PHP version!

You can see that it is not really that difficult to change your PHP version in XAMPP and it is quite simple to do. You can find out more about me on twitter and linkedin.


